Chefs and fans of Japanese cuisine will be familiar with the taste and texture of nori, which is dried seaweed typically used to wrap sushi. Nori is a simple ingredient, but it’s often store-bought, and you usually don’t see people making it themselves. However, do-it-yourself nori sheets for the ambitious home chef are a great way to impress; but how do you make nori sheets?
Here’s how to make nori sheets:
- Find or buy seaweed.
- Blanch the seaweed.
- Blend seaweed to a spreadable consistency.
- Press the seaweed between parchment paper or silicone sheets.
- Let the nori sheets dry out.
- Eat the nori with sushi or onigiri.
This article will go through all the steps you need to take to make your nori.
1. Find or Buy Seaweed
The first thing you’ll need to do is find the right kind of seaweed to make nori with. Nori is typically made from a genus of algae called Pyropia or Porphyra. This is also called red algae, and it has numerous health benefits that aren’t found in other types of seaweed.
According to this study from a special issue of Marine Drugs, red algae contains porphyran, Vitamin B12, and taurine.
- Porphyran is a dietary fiber that has antioxidant, anti-cancer, and anti-inflammation properties.
- Vitamin B12 is a critical nutrient that many vegans and vegetarians are deficient in. B12 prevents anemia and supports DNA production.
- Taurine is an essential amino acid that supports nerve growth and healthy blood pressure.
You will have trouble buying red algae in the quantity that you need to make nori sheets since they’re mostly only sold for aquariums. If you don’t have access to fresh seaweed, you won’t be able to make homemade nori.
Red algae can be found in tide pools or along the coastline. Try to only cut living seaweed that is still attached to rocks, avoiding loose seaweed that’s washed onshore. This seaweed will become much less substantial when dried, so make sure you collect enough to fill a whole sheet or two.
This video shows what kind of seaweed you should look for and demonstrates what you can expect from homemade nori sheets.
2. Blanch the Seaweed
Next, you’ll want to wash and blanch your seaweed. This will rid it of excess salt and grime from the sea and make some of the stronger flavors more subtle.
To blanch your seaweed:
- Rinse your seaweed with tap water.
- Fill a pot with enough water to cover your seaweed.
- Boil the water.
- Submerge the seaweed in the boiling water for around 15 seconds.
- Remove the seaweed and place it in a large bowl of ice water.
- Soak for around 15 minutes.
Now your seaweed is ready to be prepared into nori.
3. Blend Seaweed to a Spreadable Consistency
Making nori is similar to making paper. You’ll want to get the nori down to a mushy consistency with moderate pulp so that you can press it into very thin sheets.
Put all the seaweed you collected in a blender with about a cup of water. Blend the seaweed for about 20-30 seconds. The seaweed should be thin enough that it spreads without clumping.
Pour the mixture into a strainer over a large bowl, then press out any excess seawater. It won’t look appetizing, but this gooey green mixture will become your nori.
4. Press the Seaweed Between Parchment Paper or Silicone Sheets
Take the blended seaweed and pour it onto a flat oven-safe sheet on a baking sheet. You can use parchment paper or a Silpat Silicone Baking Mat. A Silpat is a great tool for cooks of all skill levels for a cheap, reusable, and environmentally friendly option.
Spread the seaweed out thinly and evenly, leaving several inches free on all sides.
Take another sheet of either Silpat or parchment paper and place it on top of the layer of seaweed. Then, gently press the sheet down so that there are no air bubbles and the seaweed is being compressed.
Place another baking sheet on top of this. Then take several heavy objects, such as books or weights, and evenly distribute them on the nori. Set aside to press for several hours or as long as overnight.
5. Let the Nori Sheets Dry Out
When you’re finished pressing the nori, you can dry the nori sheets. First, check that the nori looks as thin as paper by removing your heavy objects, the top baking sheet, and the top sheet of parchment paper or Silpat. Leave the nori on the bottom layer of parchment paper or Silpat and the bottom baking sheet. Don’t touch it yet!
Ideally, you should dry your nori sheets naturally by leaving them out in the sun or a dry room for several hours. Simply put them in a sunny area you know they won’t be disturbed and leave them to dry all day.
For a faster method of drying, preheat your oven to 200°F, or 93°C. Place the sheets of nori in the oven for about an hour. They should be thin, brittle, and crackle when you crumple them up.
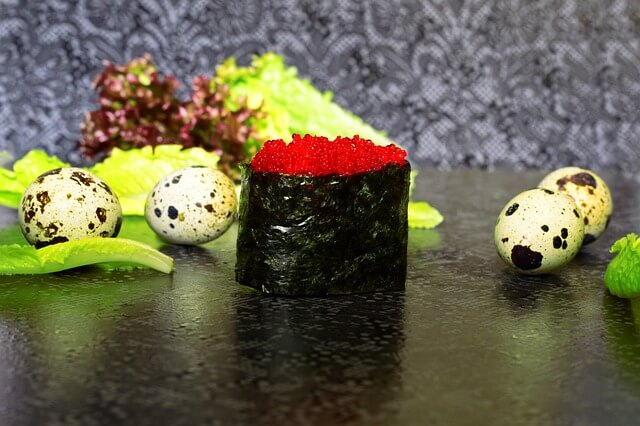
6. Eat the Nori With Sushi or Onigiri
Homemade nori can’t be stored for a long time, so enjoy it as soon as possible! Traditionally, nori is wrapped around sushi. However, you can also use it on onigiri, or rice balls, which are usually filled with fish, meat, or veggies.
You can even eat nori on its own as a snack. Nori is just as salty and crunchy as potato chips, but even more flavorful and with tons of added health benefits!
Final Thoughts
If you’ve ever been told that you can’t make nori at home, you’ll find that it’s actually quite simple to make in small quantities. As long as you can access fresh seaweed, you can make fresh and delicious nori at home. Nori is almost always store-bought, so making it yourself will impress your friends and family.
It may take you a few tries to get right, but making nori at home is a rewarding way to improve your dinner.